Monday, July 29, 2013

How to Design a Favicon for your Blog

Favicon examples: Blogger "B", Craftimism "C" Spiral, a leaf, and a zig zag

Did you know you can custom design a favicon for your blog? Thus, instead of the default orange and white Blogger "B," you can create a unique identifier to set your page apart from the others open in your browser.

www.favicon.cc screenshot of my favicon in progress. I uploaded a cropped square image from my Happy Tree Painting.

To do this in blogger, you will first need to create your 16 by 16 pixel favicon image. You can do this using www.favicon.cc and creating a new favicon or uploading a picture and turning it into a favicon. Once you have your favicon how you would like it, click "download favicon" below the image to save the favicon to your computer in the appropriate .ico extension.


Once you have your favicon designed how you want it:

  • Log into blogger and click the "Layout" tab
  • Click edit in the Favicon box to upload your creation 
  • Click save arrangement
  • View your blog to see if the new favicon worked. 
    • If you still see the "B," try this trick 
      • Open a new tab
      • type http://[yourblogurl]/favicon.ico (for example, I typed "http://www.craftimism.com/favicon.ico") in the address bar and hit enter. 
      • Refresh the page and you should see your new favicon in the upper corner. Check your blog to make sure it works. For more information, click here.


Here are some of the favicons I came up with based on my Happy Tree Painting. I ended up using the third one (which is also pictured above), although I liked the first one too. Let me know what you think of them! I look forward to seeing your blogs decorated with more than the boring blogger "B" soon!



Tuesday, July 16, 2013

Bucket Truck Cake

Inspiration: I made this for my labmate PJ's thesis defense party. He studies protein interactions and how small changes to particular residues in a protein (FtsZ) affect the ability of this protein to interact with itself and the function of the protein in general. One of the analogies he used to model this protein's interaction was with a bucket truck - the truck is the core of the protein, the boom is a flexible linker near the end of the protein, and the bucket is the tail of the protein that is important for its interactions with other proteins. To celebrate his accomplishments, I made this cake in the shape of a bucket truck.

Cake pan found at Bed, Bath, and Beyond
To make this cake, I used this cake pan that has adjustable inserts to make certain shapes like letters and numbers. I set the inserts as diagrammed below and followed the instructions on the pan to make the cake - filling the square insert as well for the bucket. I then decorated the cake using store bought icing (I may be crafty but I am not much of a cook - Betty Crocker is my friend :)). I drew the window and tires using black piping and added Reeses Peanut Butter Cups for the tires. Finally, I made the boom out of two pretzel sticks and attached the bucket.

Bucket truck diagram using pan and inserts

Dr. PJ cutting the cake


Tuesday, July 9, 2013

Knitting needle organizer


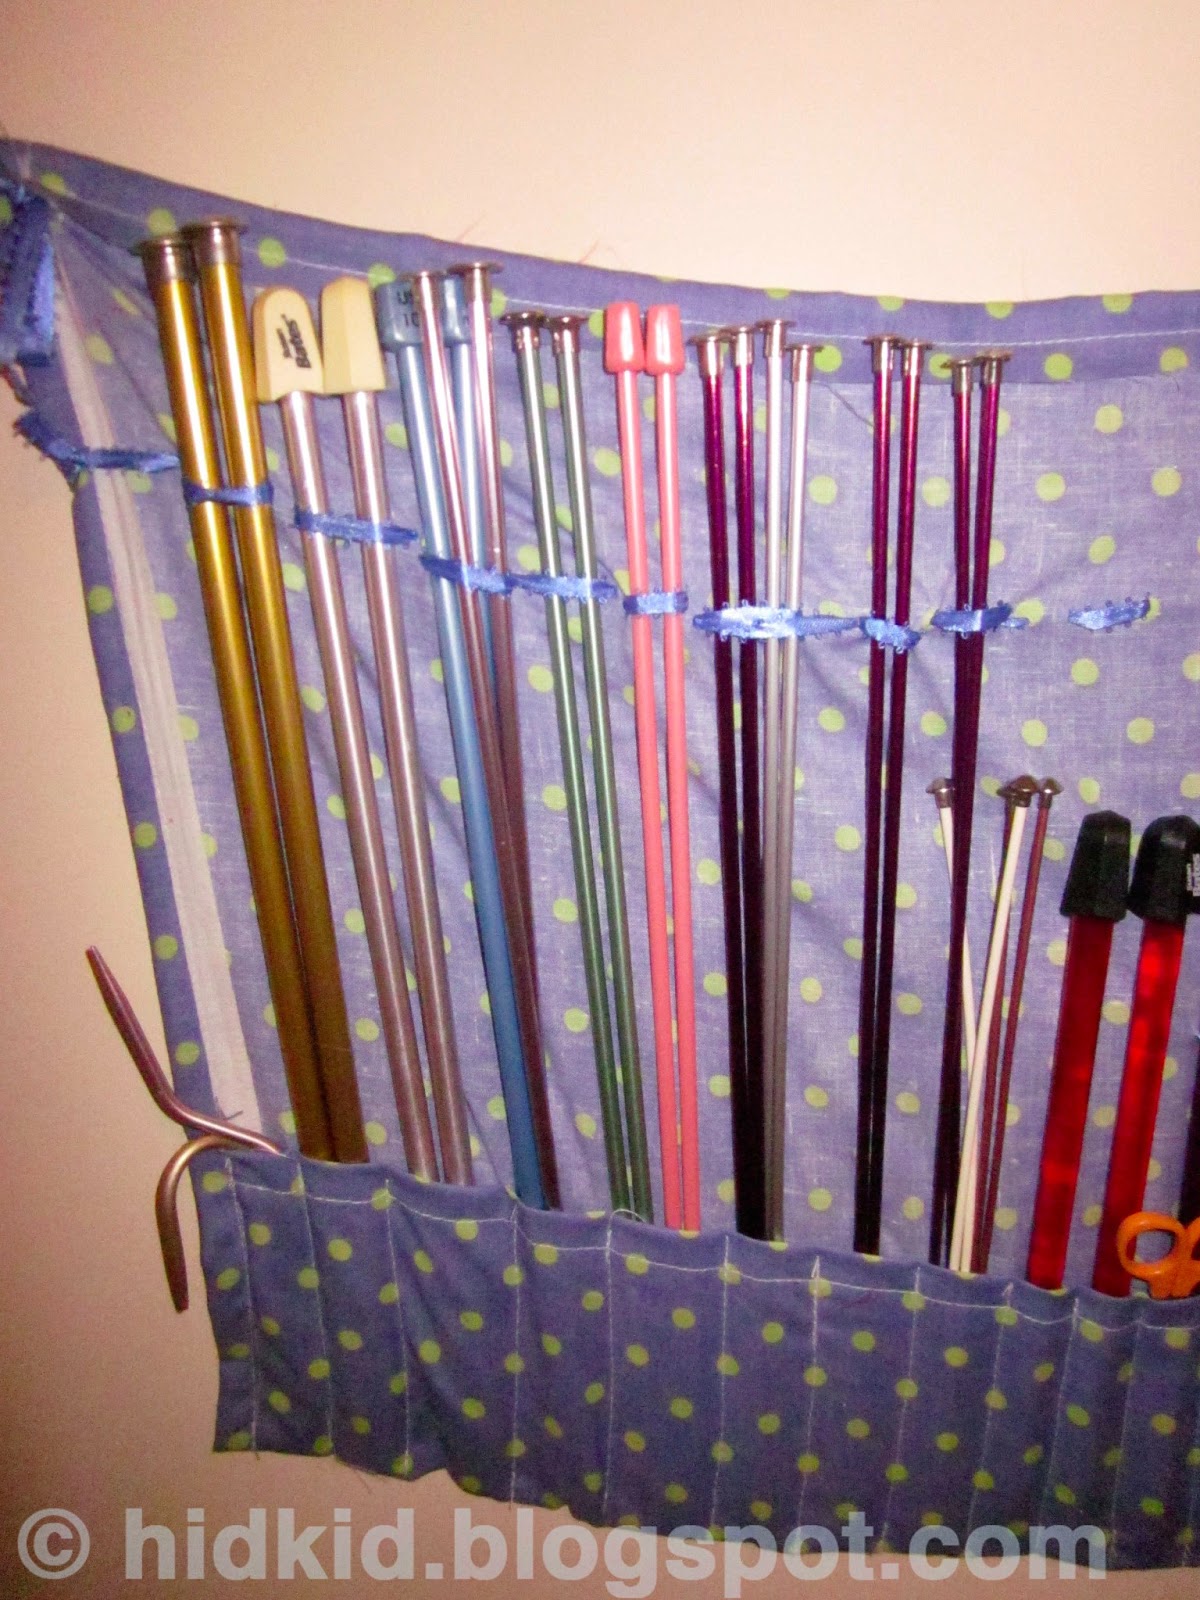
So, I have a lot of knitting needles. To keep them organized, I made this organizer out of some spare fabric. I first hemmed all the edges (if I were doing it again, I would have first cut off the white stripe, but since I was going for functionality and not for looks, I think it is okay). I then folded one end up ~5 inches and sewed along the sides. To hold the needles in, I sewed lines ~1 inch apart, making sure I had enough for all my needles.

To support the tall needles, I hand sewed ribbon near the top.

To easily identify the circular needles, I made them "name cards."

I keep the "name card" of the needles currently in use on a yarn needle that I store on the back of the organizer - so I don't lose those pesky little things!


I attached some ribbon to the top corners so that I could hang the organizer on the wall

A space for everything!